On This Page
- Exterior House Painting Prep
- Why Exterior Paint Prep is Important
- Here are the Most Common Steps for How to Prep to Paint the Exterior of a House
- Wear the Right Clothing & Safety Gear
- Remove Contaminants
- Comprehensive Cleaning for the Exterior Surfaces of Your House
- Exterior House Paint Prep & Preparing Your Home’s Exterior to Ensure Proper Paint Adhesion
- Remove Old & Peeling Paint
- Caulking, Sealing & Repair
- Prime the Exterior Surfaces to be Painted
- What To Look For In An Exterior Primer
- Tape, Cover & Protect
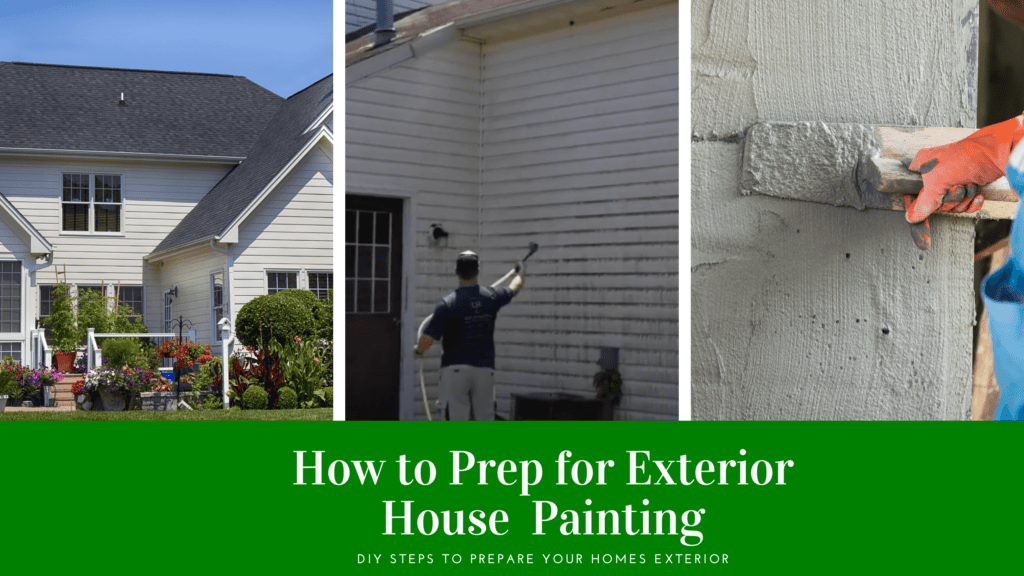
Exterior House Painting Prep
There’s nothing like a fresh coat of exterior paint to boost curb appeal and add elegance & durability to the exteriors of your home. Painting your home is a wise investment in time and money. When it comes to exterior house painting prep, the key is indeed in the attention to detail. Painting the exterior of a house yourself or DIY isn’t difficult if you use the right equipment and follow the right steps.
Though the process can be time-consuming depending on your house’s size, the task is still achievable for the DIYer who has the time to dedicate to the project.
Why Exterior House Paint Prep is Important
There are many necessary steps to take before even beginning an exterior painting job. Do you know what the most important step is when painting the exterior of your home? Surprisingly, it’s not the painting itself. It’s actually the proper pre-preparation of the surface you are painting.
Yes, preparation is the most important part of the job. If a surface is not adequately prepared, the paint may not adhere, and obviously, this can be a big problem.
Proper preparation (or not taking the time to do these important steps) primarily determines the outcome. Keep in mind that your home’s exterior paint job is about much more than aesthetics; a proper exterior paint job provides a protective barrier against damaging elements.
After deciding to have the exterior of your home painted, the next step is to make sure that your home is properly prepared for exterior painting. Preparing the exterior of your home for a new coat of paint will save you time and money.
Many people skip the preparation step because they mistakenly think a new coat of paint will seal and cover the old paint’s imperfections. Just painting over the old coat can cause bubbles and cracks in your new coat of paint due to loose paint layers, dirt, and chemical reactions. This lets moisture in and can lead to several costly home repairs, including mold remediation and dry rot repair.
Here are the Most Common Steps for
How to Prep to Paint the Exterior of a House
Wear the Right Clothing & Safety Gear
Exterior painting preparation is a dirty, damp job, so wear clothes that you don’t mind dirtying or getting wet. Protective goggles are a must for safety reasons, especially during the scraping process. Chipped-off paint and other materials could easily fly into your eyes. Work gloves are also important for protecting your hands during the prep process.
Remove Contaminants
Although lead paint has been outlawed since 1978, many homes still have lead paint on their walls. If you suspect lead, don’t try to scrape or sand it off, and don’t wash. A contractor who’s certified to handle lead abatement must handle the paint’s removal before you get started. Test the paint before you proceed with any further exterior painting prep.
Comprehensive Cleaning for the Exterior Surfaces of Your House
Help the new paint adhere by getting the house’s exterior surfaces as clean as possible before you paint. If the house has existing paint, some opt to speed up this part of the process by power washing the entire house. Pressure washing is also an option for stained walls, although you may want to use gentler options depending on the exterior surfaces’ condition.
If the house has softwood siding, avoid power washing as it can damage the wood. Softwoods such as redwood or cedar, especially if they’re older and weathered, need to be cleaned by hand scrubbing with detergent and water.
If you are going to forgo using a power wash or pressure wash, you can use a hose with a strong water flow to clean the exterior surfaces. To step the cleaning power up a notch, use a special brush attachment for the hose along with liquid soap. However, if you go this route, take extra caution to make sure you rinse off all soap afterward.
Mold & Mildew
A common contaminant, especially in humid areas, is mold or mildew. Look for black, green, or brown stains that may have a fuzzy appearance. If you’re unsure whether a given stain is mold or mildew or just dirt, apply common bleach to it. If it bleaches away, you’ve just killed some mold or mildew.
Use bleach or another EPA-registered micro biocide or fungicide to remove mold and mildew. While bleach alone can work in a 3:1 solution mixed with water, more effective, highly concentrated products are available. Look for cleaners and degreasers that do double duty, removing not only mold and mildew but also grime, grease, and oil.
Exterior House Paint Prep & Preparing Your Home’s Exterior to Ensure Proper Paint Adhesion
The key to getting paint to blend in and adhere is to prepare the surfaces correctly. There are no easy shortcuts to this significant step. When it comes to exterior house painting prep, it’s going to take some elbow grease and patience, but this step is well worth the improvement in the results it produces.
Remove Old & Peeling Paint
You’ve got a couple of different options for removing the old paint. The options are labor, but necessary if you want to do the job right.
-
Scraping Off Old & Peeling Paint
This can be done with a putty knife for tiny areas or with a paint scraper, of which there are several types available. Look for one that’s comfortable in your hand, which has reversible blades for more blade life. The ends of the blades should be rounded to dig into the siding and gouge it. Make sure to put your goggles on before you scrape any loose paint. Also, be sure to wear a dust mask or even a respirator and work gloves while working with peeling paint.
-
Heat Gun
For stubborn paint or for scraping multi-layered paint, consider using a heat gun or rotary paint remover. A heat gun looks like a hairdryer and reaches scorching temperatures as high as 100 degrees Fahrenheit. Make sure to wear work gloves to protect your hands and keep the heat gun away from all fresh paint, paint fumes, paint cans, or paint thinner/cleaner to avoid fire hazards.
-
Rotary Paint Remover
A rotary paint remover, which can be attached to an electric drill. The stiff wire tines on the rotary quickly remove large areas of paint. Please take caution when using this tool, as it should never come into close contact with your body parts. It’s a good idea to test and practice using the tool with a test surface like a wood piece before taking it to your exterior.
-
Sanding
Sanding your home’s exterior surfaces is necessary to provide a real mechanical bond between paint coats. If you don’t rough up the surfaces sufficiently, your paint job may look good for a time, but the paint can start to show imperfections in just a few years.
This can be done with a hand sanding block or with an electric sander. Use open coat sandpaper, which won’t clog up as quickly with paint particles. As you sand off the loose paint and get back into solid material, be sure to feather the solid paint edges so that your patched areas won’t be visible.
There are also special disc tool attachments specifically for removing paint. These are more aggressive than sanding alone and work well in combination with conventional sanding methods if you need the extra power.
Caulking, Sealing & Repair
Caulking is specifically designed to seal cracks, fill holes, gaps, and joints in surfaces. Caulk is important to seal & insulate, blend in patched areas, and extend your paint job’s life.
Look over the house closely for damage and peeling paint. You may have to fill holes & caulk surfaces. Be sure to fill all nail holes with spackling compound and caulk all gaps between the siding and trim boards.
Caulk any cracks you have: caulk cracks and small gaps (1/8″ or smaller) using a paint-able exterior grade caulk. When caulking, only fill the cracks and use a wet rag to wipe the excess caulk off the wall.
In any area where you have removed paint, you may also need sand edges to help the new paint cover and hide the edge. Caulk any cracks, seams, or gaps, placing extra care near the doors and windows so that your paint will stick properly in these tricky areas.
Prime the Exterior Surfaces to be Painted
An important step in exterior house painting prep is using a quality primer. Primer is an undercoat that you paint onto the wall before painting it with color. If you’re changing your wall’s color from very dark to very light, priming it first will make it easier to cover with the lighter color and could save you from applying a second or even third coat of paint.
An exterior primer is as important as any of the topcoats which go on after it. That’s because the best exterior primer provides a stable foundation for the layers of paint applied after and prepared the painted surface in numerous ways.
Whatever surface you are working with, the outside of your house needs a quality exterior primer to protect the surface from the elements.
Priming also helps new paint stick to previously painted surfaces. It would be best if you primed any areas where old paint has been peeled off to create a cohesive paint job.
On most unpainted exterior surfaces, the standard procedure calls for a primer coat followed by two topcoats of paint. Hardboard siding may also require a primer.
Exterior primer formulations can include a range of additives, such as stain blockers, mildewcides, and UV inhibitors. The best product for your house depends on the materials you’re painting and the exterior surfaces’ general condition. Given the importance of exterior primer, it’s key to take the time and do the research to find the best one for your intended application.
What To Look For In An Exterior Primer
So how do you find the best primer for your home? The main idea is to find a primer that will adhere to the specific surface you’ll be painting.
-
Acrylic Primer: An Acrylic primer or latex primer is water-based and most commonly used for wood siding, trim, and galvanized metal.
-
Alkyd Primer: An Alkyd or oil-based primer is commonly used on steel or wrought iron as they can come in formulations that are rust inhibiting.
-
Masonry Primers: These are specifically formulated for brick, concrete, stucco, and other masonry surfaces. These have more permeable properties, which allow any moisture within the masonry to escape without damaging the paint.
-
Specialty Primer Formulated for Specific Concerns: Many primers are specially formulated for specific issues. Mildewcide, UV blockers to prevent fading, and stain blockers are a few examples of these specialty products.
Tape, Cover & Protect
This is the final step before getting into the actual painting. You will need to use painter’s tape to protect windows, doors, trim, vents, and anything else that is not going to be painted. Be sure to cover your windows with plastic before painting to keep overspray from getting on them. You may also want to cover any landscaping that is close to your home’s exterior with plastic as well.
Place drop cloths anywhere you do not want to paint dripping, including porches, railings & concrete. Landscaping such as plants, shrubs, bushes, & rocks in the vicinity of your exterior walls should be covered as well.
These are the general steps one should undertake exterior house painting prep. There is a lot of work involved, but doing the prep work with the proper attention to detail is very much worth it. You will be rewarded with a more durable and professional-looking exterior paint job in the end.
The Article Exterior House Painting Prep First Appeared ON
: https://gqcentral.co.uk
No responses yet